You can quite easily repair a broken window regulator
on your BMW E46. Read on.The first window
regulator failure on my wife's 2000 328i was covered under warranty.
When it happened again, the warranty had run out, so I decided to see if
I could fix it myself.
It turned out to be the rear slider that pushes the window up and down.
The window uses a single cable that snakes between the front and back
window rails. There is a small metal cylinder that is crimped onto the
cable where it passes down each rail. This cylinder is responsible for
pulling the window up and down. It fits into a plastic
clip that in turn is attached to a metal bracket that screws on to the
front and rear lower corners of the window.
The problem this time (and probably last time, as the symptoms were the
same- crackling noise followed by jammed window that will not go up or
down) was that one end of the plastic clip broke, and the cylinder came
out. This prevented the rear of the window from going up, so the window
jammed.
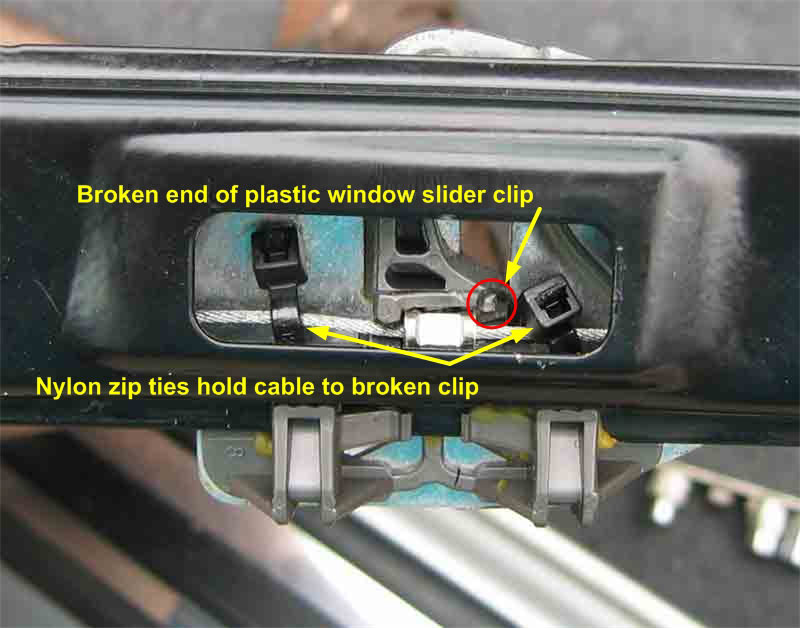
I decided that it was easier, and much cheaper to fix the clip than to
replace it. I re-inserted the cylinder into the broken clip and held it
firmly in place by using 2 nylon zip ties, threaded through the metal
bracket. (I plan to do this to the front clip as
well, as a pre-emptive measure. Maybe I'll do the remaining clips on
the car also.)
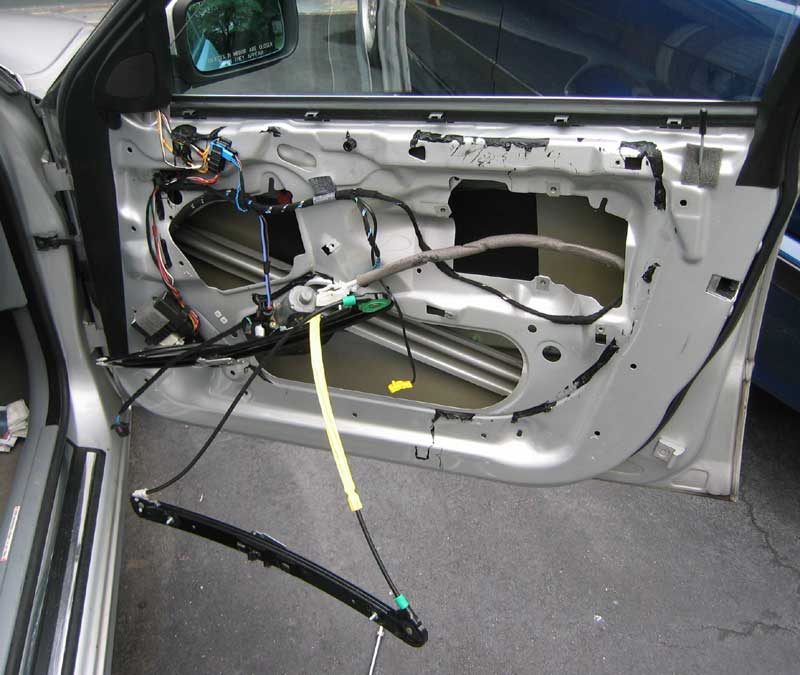
I have included a picture of the window mechanism - removed from the
door, and also a close-up of the repaired clip, below.
Note: In some instances, the airbag warning
lamp may come on when you reconnect the airbag. If the airbag lamp
does come on, it can be reset by the dealer or a shop with the
appropriate tool. To avoid this, you can disconnect the battery before
beginning this procedure, and reconnect it after plugging the airbag
back in.
To remove the window mechanism (see photo below):
- pry off the door trim piece (fake wood on my
328i, metallic plastic on my M3), using a small
flat screwdriver
- remove the two Torx screws (#10 or 15)
- pry off 1 plastic cover on top and 2 under the door handle
- remove 1 Torx screw under each cover
- slide a slot screwdriver or other thin, stiff object between the
lower edge of the door lining and the door, and pry it off so the
plastic clips attaching the panel to the door pop out of the door.
- pull the panel away from the door, popping the other clips out
- pull the upper edge of the panel away from the door, releasing it
from the clips, and lift up so it clears the door lock button
- disconnect the door latch cable from the panel by rotating it away from the
panel
- unplug the speakers
- remove the door panel and put it in a safe place
- unscrew 3 10mm bolts from the side airbag
- remove airbag from door, and unplug yellow connector. Put this
explosive device in a safe place.
- remove unidentified black plastic control box from front section of
door (2 Phillips screws)
- carefully remove the black foam moisture barrier on the door, trying
not to tear it
- move the window up/down such that the two 10mm nuts at the bottom
corners of the window are visible through the front/rear slider rails
and door panel. If the window is jammed (which it is, or you would not
be doing this - unless you are smart and doing this before the window
mechanism breaks), you will need to use a combination of the window
switch and pushing/pulling by hand to move the window into position.
- remove these 2 bolts - the nuts behind them can then be removed
also, or they will fall into the bottom of the door
- remove the 5 10mm nuts holding the window regulator to the door
- cut 2 nylon zip ties holding the window cable to the door frame
- remove the rear rail from the door by twisting it out
- remove the front rail (you should install zip
ties on both front and rear rail)
- if a clip on the rail has broken, push the metal cylinder on the steel window cable back into position
in the plastic clip
- using 2 nylon zip ties, as per photo below, attach the cable to the
metal bracket
- reinstall motor/front rail
- reinstall rear rail
- re-attach window to sliding brackets
-
reassemble door panel
Photo of disassembled door, showing window mechanism
Close up of broken clip, with nylon zip ties installed
This repair has been working for several few years now, with no problems.
Happy motoring!
Check out my
low-profile front license plate holder. No holes required in the front of
your bumper.
HOME |